Tallys Default In tally, there are only few set of features and template designs are…
This guide explains the configuration and usage of the Voucher Authorisation feature enabled through your custom TDL. The feature allows selective approval of vouchers by designated users, with the ability to set up local and remote approvers for each voucher type.
Step 1: Enable Security for the Company
Before using voucher authorisation, you must activate Security Control in the company:
- Go to Gateway of Tally → Alt + F3 → Alter Company.
- On the right side, set:
- Control User Access to Company Data → Yes
- Save the company settings.

Step 2: Enable Voucher Authorisation using Tally Master TDL
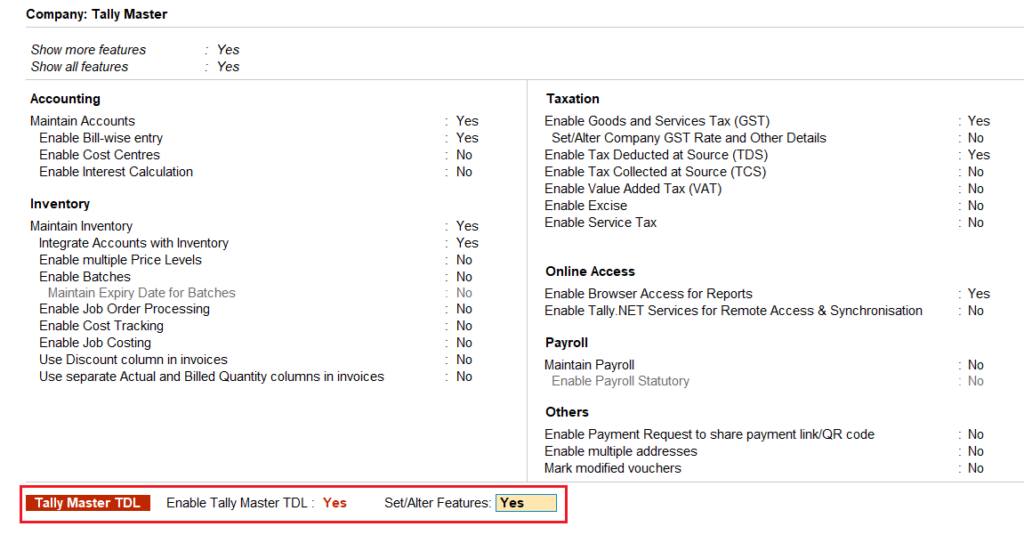
- Go to Gateway of Tally → F11: Company Features.
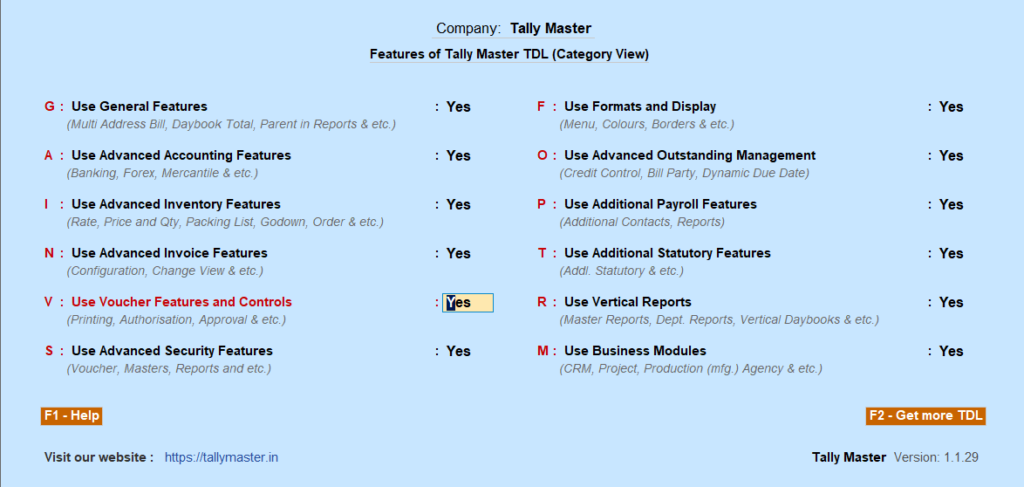
- Select Set/Alter Tally Master Features → Press Enter.
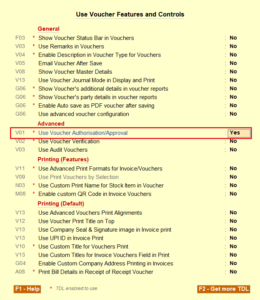
- Under Voucher Features & Controls, enable:
- Use Voucher Authorisation → Yes
Step 3: Configure Approver Access in Security Level
- For Tally.ERP 9:
Go to Gateway of Tally → Alt + F3 → Security Control → Types of Security - For TallyPrime:
Go to Company Menu → User Roles
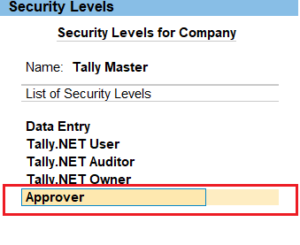
- Create or modify a role/security level (e.g., Approver).
- Under the Allow List, enable:
- Full Access → Pending Vouchers
- Save the security level.

Step 4: Create Users for Entry and Approval
- For Tally.ERP 9:
Go to Gateway of Tally → Alt + F3 → Users and Passwords - For TallyPrime:
Go to Company Menu → Users and Passwords
- Create the following users:
- User A (Data Entry):
- Assign a security level that allows voucher entry but not approval.
- User B (Approver):
- Assign the Approver security level created in Step 4.
- User A (Data Entry):
📌 Make sure User B is listed as an approver in the voucher type configuration.

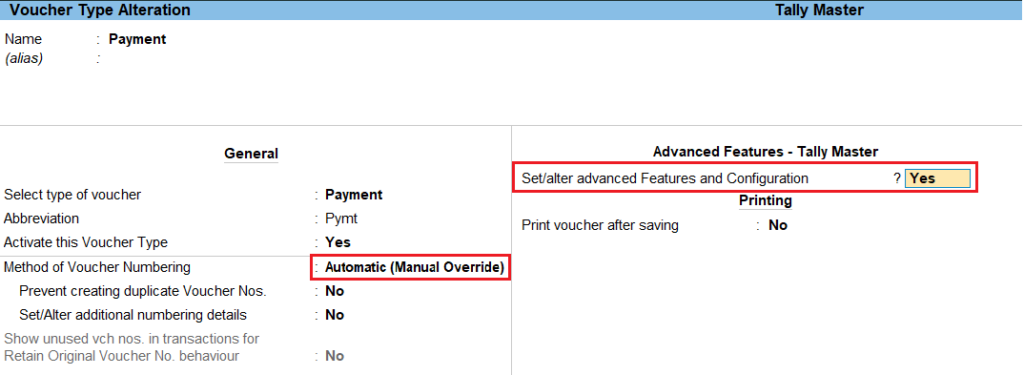
Step 5: Enable Authorisation in Voucher Type
- Go to Gateway of Tally → Alter → Voucher Type.
- Select the voucher type (e.g., Sales, Purchase) to configure.
- Press F12 or go to Set/Alter Advanced Features & Configuration.
- Enable:
- Voucher Authorisation → Yes
- Set Unapproved Voucher Action (e.g., Restrict from books)
- Assign:
- Approver Name 1 (Local)
- Approver Name 2 (Local)
- Remote Approver (Optional)
- Save the voucher type settings.


6. Step 6: Create Vouchers (Entry User)
- Login to the company as User A (Entry User).
- Enter a voucher of the configured type.
- On saving, the top of the screen will show an “Unapproved” flag.
- This unapproved voucher can be viewed through:
- Display More Reports → Pending Approval Vouchers
📌 The voucher remains excluded from books until approved.

7. Step 7: Approve Vouchers (Approver User)
- Login to the company as User B (Approver).
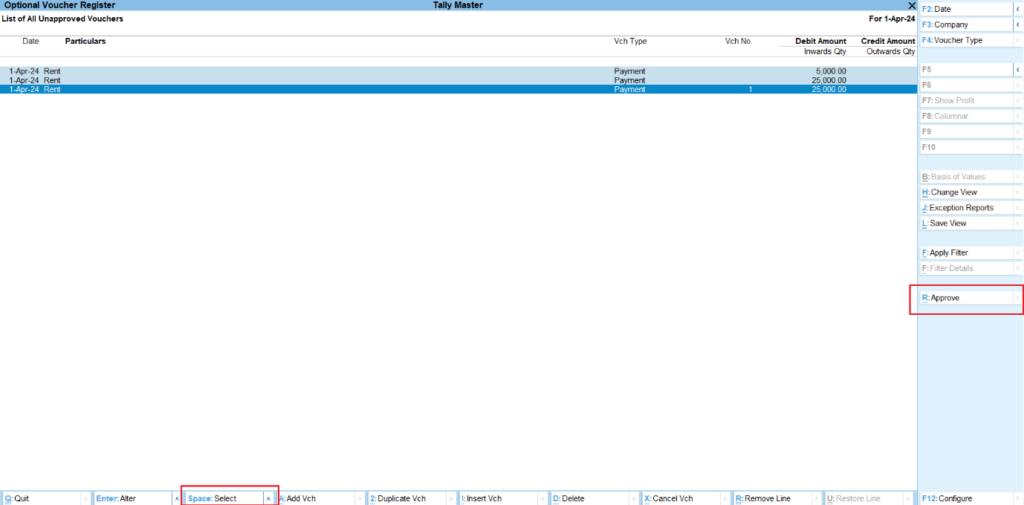
- Navigate to Display More Reports → Pending Approval Vouchers.
- To approve:
- Open a voucher and press “Approve” from the right panel.
- Or use Spacebar to select multiple vouchers and choose “Approve” for bulk approval.

📝 Notes for the Above Features
- Dynamic users and voucher types can be configured for authorisation.
- Approved vouchers can be re-approved if needed.
- Preferred to use AutoManual voucher numbering to maintain sequence, including unapproved entries.
- Only users mapped as approvers can approve those specific voucher types.
